
-
Simple Fantastic Kitchen
This post may contain affiliate links. See my disclosure policy.
10 Year Review of Blendtec Blender: Is It Worth the Hype?
Today I’m reviewing the Blendtec Total Blender Classic after having owned it for 10 years. I will walk you through some of the things I’ve learned over the years in terms of my own personal best practices for using this unit. Then we’ll see it in action, tackling all sorts of fun recipes. And finally I’ll give you my overall 10-year review of The Blendtec: Is the Blendtec really worth it?
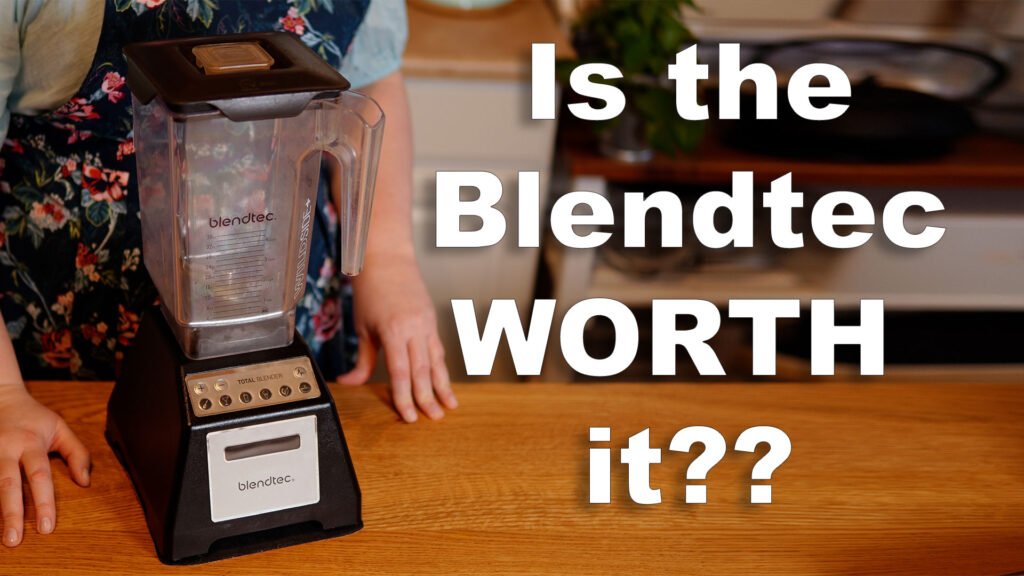
If you’ve been curious about or considering this High powered blender for yourself, then you’ve come to the right place. You can watch my detailed video below or read on for the full experience!
Blendtec | High Powered Blender
The Blendtec is a high powerered blender that can do many things including pulverizing fruits and vegetables, turning them into the smoothest silkiest liquids.
It’s an easy and delicious way to consume the whole fruit or vegetable and thereby get all the fiber and nutrients packed inside which is so much healthier.
Now a standard blender can handle a banana but it takes a high powered blender to pulverize things like frozen fruits, celery, fresh ginger, and nuts turning them into a smooth creamy beverage.
I’ve used my Blendtec for smoothies, waffle and pancake batters, soups, cocktails, sorbets, shakes, salad dressings, sauces, and so much more.
Having a high power blender, to me, is a necessity in my kitchen.
And now I’m going to tell you a little story.
My Blender History | Storytime
I originally owned another mixer. You know the one. It’s Blendtec’s major competitor and it worked great, but I did have a few complaints about it. a
First, I always had to tamp down the food. Second, it was so tall it didn’t fit under my cabinets on the countertop. And third, the blades were very sharp to the touch which is to be expected but also a little nerve-wracking when it came to cleaning the blender jar.
Well, after 3 and 1/2 years that top-of-the line blender died on me. The motor just clean stopped. I had bought it at Costco so I didn’t have to go through the warranty process and instead of just getting a new version of that brand, I said to myself, “What else is available on the market?” And low and behold, the Blendtec was recommended to me so I thought I’d give it a try.
Well, here I am 10 years later with that same Blendtec Blender and I’ll tell you some of my first impressions when I originally bought the product. It’s like an unboxing but 10 years later.
First, there is no tamping down required. I almost never have to stop the blender for standard items like smoothies to push ingredients down and this was wonderful for me.
Second, it actually fits under my countertop cabinets. I love that.
Third it was less expensive than its main rival and if you check the prices currently listed for the Blendtec and its main competitor, you might be surprised as to how much savings you’ll have.
Fourth, it matches the competition’s power in terms of pulverizing and that’s probably the most important thing.
And finally, the blade at the bottom isn’t really that sharp to the touch, so I don’t worry when I’m cleaning it that I’ll cut myself, although I almost never have to have my hands near the blades, because the cleaning cycles work so well for this unit.
Blendtec Blender | Specifications
By the way, the Blendtec blade is called the blunt safety blade and it’s 80% thicker and 10 times stronger than other blades. Remarkable.
Now it should go without saying, please still be careful when handling the jar and never ever put put your hands inside while it’s mounted on the motor. Use best practices as with any other blender and I encourage you to read all the safety instructions regarding this product before using. They are in the user manual and can also be found online.
So let me tell you the full specs. It is a powerful 1560 Watt Motor. The push button controls are fully sealed. There are up and down buttons that allow you to control 10 speeds manually by pressing up or down for more or less power.
it also has a pulse button to manually control via power bursts as well. There are also pre-programmed automated cycles for batters sauces, dips and dressings, mixed drinks and milkshakes, smoothies, soft serve ice creams, frozen yogurts and sorbet, whole juices and green drinks and finally hot soups, hot chocolates, hot drinks and syrups.
It also has an illuminated LCD timer that displays the remaining time on blends and there’s something really fun about the display too. Every time you turn the power on, a number will come up. That number is just like your car’s mileage, except the Blendtec will tell you how many blends it’s done in its lifetime. The number on my machine currently has over 1,300 blends. Can you believe it? That’s pretty cool.
It comes with a 75 oz volume impact resistant BPA free jar called The Wildside plus jar. The jar also has a patented fifth side that allows for bigger faster blends. The jar has a vented lid and a 36 ounce liquid fill Max Capacity that accommodates wet and dry foods and serves an average of three to four people.
The jar has measurements on two sides. One side shows the cups and ounces, the other side shows the milliliters and the centiliters.
Washing the jar in the dishwasher is not recommended, but cleaning in between uses is extremely easy. I will detail that when we make our recipes. One thing I’d like to share, I remember hearing from some one that best practices with this unit is to only turn the power on when you are using it it can be plugged in at all times but shouldn’t be turned on unless you are about to use it. Then shut it off immediately after use. This is to keep the motor happy and I found it’s worked extremely well for me so I recommend this practice highly.
So now let’s see this puppy in action. First let’s make a traditional staple in my house, a smoothie.
Blendtec Blender | How to Load the Jar
For Best Practices they recommend loading the jar with liquids first then soft solids then hard dense or frozen items. I have found this to be absolutely correct so that is how we will load our items today. By the way with this unit you should never push ingredients down while the blender is working. I rarely need to do this as I said before but if necessary always stop the blender first, remove it from the motor base before doing it. Just to make sure you don’t accidentally turn it on while pushing something down… that would not be good.
Blendtec Blender | Test 1: Mixed Berry Smoothie
Let’s make my delicious mixed berry protein smoothie.
So we’ll start by adding 1 and 1/2 cups of chilled unsweetened almond milk, half a teaspoon of vanilla extract, then add one fresh banana and really you can just put that in there whole. Then add approximately one cup of fresh baby spinach leaves. Now you can also use frozen spinach if you want. That works just fine… works great actually.
Then add six whole raw unsalted cashews, about 2 cups or 10 oz of frozen mixed berries and you can just stick it in a whole large clump.
Next up, I like my smoothies to have some protein so I recommend adding one serving of the protein powder of your choice. Today we’ll go with a plant-based protein powder I’m using the Orgain Organic Vanilla Protein Powder that also contains 50 superfoods and it has 21 gram of protein per serving. It’s packed with protein, nutrition, and at the end of the day, it tastes awesome.
I’m going to let my powder sit in a lump at the top of the blender jar for a reason. We’re going to try to be very efficient. Next we’ll be adding one teaspoon of honey and we’ll do this efficiently by using our teaspoon to make a little crater in the protein powder. Now just add one crater sized teaspoon of honey to the blender.
Now one teaspoon of honey is the perfect amount of sweetness for me but feel free to add more if you like it sweeter.
By the way we are well below the 36 oz max liquid fill line so we’re fine with this.
So you’re going to really secure the lid by pressing down all the way. Now you’re going to turn the blender on. The power button is in the very back of the blender towards the bottom. And then we’re going to press the Smoothie button for one cycle or until completely combined. This usually takes about 1 to 2 minutes.
The unit can jump a little bit when first starting a cycle so I find it’s best to hold the blender from the sides of the motor or to gently press down on the top of the jar. After about 15 to 30 seconds I usually release my hold on the unit and just let It blend. From my experience I have never had the lid fly off once I’ve completely secured it, no matter how much the unit moves.
It’s fully blended after one cycle and it looks absolutely beautiful, silky smooth with no lumps just the way I like it. And it will be chilled when served because the mixed berries double as ice cubes. And it’s absolutely delicious! This is the perfect smoothie to start your day, drink post workout, or have as a healthy snack
FYI, I’ve made smoothies with every fruit imaginable including apples and they turn out just this smooth and by the way on this model you can stop any pre-programmed cycle just by pressing that Cycles button a second time
Blendtec Blender | How To Clean
So now we’re going to clean the jar. This is so simple. You just fill it with one cup of warm water and a little dish soap, you blend it for 10 to 15 seconds on the pulse button, rinse it out, and that’s all you have to do.
But I will tell you for my best practices I do like to rinse it out first, just running water inside of it and sometimes taking a non-scratch sponge to the sides and the creases of the lid and then run the cycle on pulse for 10 to 15 seconds with the dishwashing soap and the water. Then I rinse the jar and lid with water until no more soap in there.
It’s important to do a cleaning immediately after use. That way nothing gets stuck on and cleaning truly is very easy and quick.
Now let’s rice some cauliflower in the Blendtec.
Blendtec Blender | Test 2: Ricing Cauliflower
First add your cauliflower to the Blendtec jar, add up to the max fill line. Then you’re going to add enough water to cover the vegetables that means your vegetables really can’t be above the 36 oz line so as you can see I’m right up to that 36 oz line with the cauliflower. If you have more cauliflower you’d like to rice, just do it in a couple of batches.
Now you secure the lid. We’re going to turn it on then press the pulse button four to five times or until the cauliflower has reached your desired texture.
Then, we’re going to open it up now we pour the contents of the jar over a mesh strainer and allow it to drain.
And you are left with cauliflower rice that you can toss into a saucepan or onto a baking sheet to make into a low carb cooked rice the way you like it. If you want the rice cauliflower to dry a little faster you can pat it down with some paper towels.
I just like to leave mine inside of a bowl that’s just underneath it for a while. That just let’s all of the water come out of it naturally and it happens fairly quickly.
It’s pretty darn near perfect looking. So that is how you rice cauliflower in the Blendtec and it turns out great. For our purposes, we will leave the full cauliflower rice recipes for another day. Now let’s make an almond milk recipe
Blendtec Blender | Test 3: Making Almond Milk
We’ll start by adding four cups of water, so you should be almost up to the liquid fill line but not all the way up.
Then add 1 cup of raw unsalted almonds, 1 teaspoon of vanilla extract, 1/8 a teaspoon of sea salt, and now if you’d like you can choose to add a sweetener of your choice. Today we will be sweetening our almond milk by adding two whole pitted dates.
Then get that lid on securely, turn the Blendtec on, then select the whole juice setting for one cycle.
Okay it’s done and although it’s very very smooth, there are teeny tiny little bits and chunks of almond that are going to be in there that you don’t really want for an almond milk. So we’re going to strain that through a nutmilk bag or cheesecloth which I have.
You’re going to strain the mixture into some kind of a bowl preferably a large container with a pour spout. It’s just going to be easier for you.
There is a drawstring on the bag I’m using and I recommend that you use or the liquid could spill out.
So you press carefully on the bottom and more milk comes out so that’s pretty much everything.
But it’s recommended that you put it back in the Blendtec one more time for just absolute silky smoothness. We are going to wash the Blendtec jar first though, just to get all the little particles out of it.
Now we’re just going to pulse it to clean it for about 10 seconds and we’re done. I mean that was like a minute total to clean it. Now we’re just going to rinse it out. Now that it’s completely rinsed, pour the strained mixture back in the Blendtec jar.
Now, looking at the Blendtec jar, we’re really at about four cups of almond milk, even with using the nutmilk bag and straining everything through. We’re still pretty much almost at four cups of almond milk which is awesome.
Then press pulse for three to five times until it’s the consistency that that you like. It is silky smooth with no particles and tastes so delicious! How wonderful that you can make gourmet almond milk in the Blendtec.
Next we’ll make our carrot ginger dressing
Blendtec Blender | Test 4: Carrot Ginger Dressing
We’ll start with one cup of avocado oil. Add 1 tablespoon of lemon juice, 1/4 cup of coconut aminos, 3 tablespoons of apple cider vinegar. Note, you can also substitute 3 tbsp of rice vinegar here. Next add 1 tbsp of avocado oil mayonnaise, which acts as an emulsifier to keep the oil and vinegar from separating.
Now add 1 and 1/2 cups of baby carrots, two large stalks of celery cut into pieces that fit in the blender easily. Now we’ll cut a quarter of a yellow onion and put that in.
Now we’re going to add roughly two tablespoons of fresh ginger, so just cut off a piece or two, each piece about a 1 inch cube.
You don’t have to peel the ginger in a high powered blender but you do need to wash the skin thoroughly as you would a potato which we’ve already done. The skin of the ginger has so many nutrients and antioxidants so I love to include it. So we’re going to just drop it right in.
Now we’re going to add roughly 2 tablespoons of honey. And of course you are going to taste it after it’s finished blending and make sure you don’t prefer it sweeter. Some of these ingredients can make it taste just a little bit bitter, so you want to make sure that the honey is sweet enough to balance it out.
Now we’re going to add Himalayan sea salt and some cracked black pepper doing about 10 turns with each.
Now get that lid on nice and tight, turn the power on and press the Batters and Sauces button for one cycle or until it is the consistency of you desire.
The consistency looks perfect to me, so let’s give it a taste.
That is perfect, absolutely perfect.
Now I’ll decant it into my nifty salad dressing container and I can really see the consistency of the dressing. It’s a very traditional carrot ginger consistency. If this one is a little too thick for you though, feel free to add a little bit of water about one tablespoon at a time until you reach the thickness that you desire. Of course you would keep blending it in the Blendtec after adding the water to make sure it’s thoroughly incorporated.
Then I’m going to pour the salad dressing onto a bed of fresh romaine with some tomatoes on it. There is practically an entire salad already in this dressing container so I don’t really need too many more vegetables. Now if you want it a little more traditional, you might grate some carrots on top, but I want to keep this salad as simple as possible so that our dressing can be the star of the dish.
I will try the dressing on the salad. That is absolutely delicious and so very healthy! Whole vegetables in a salad dressing.
Blendtec Blender | Final Review
So what are my overall thoughts on the Blendtec how does this thing hold up after 10 years is the Blendtec really worth it? The answer is a resounding yes. I have absolutely loved mine for 10 years it’s been a reliable workhorse in my kitchen and I highly recommend it.
There’s only been one con and it’s mainly an aesthetic one and honestly I had the same issue with the other name brand high powered blender as well the issue is simply that the jar did get a somewhat cloudy residue on it after a while. I have a work around for cleaning this that I will detail below.
Other than that small aesthetic issue I have had no problems I have been amazed at its function reliability and tremendous power over its 10 years of use in my kitchen over, 1300 Blends! My goodness that’s kind of amazing.
Blendtec Blender | Cleaning the Jar’s Cloudy Residue Build-Up
As a note, it’s possible that this cloudy residue is due in part to the extremely hard water we have.
Regardless, it was pretty easily remedied by leaving a solution of vinegar baking soda and water in it overnight and then scrubbing the sides and running a Blendtec traditional cleaning cycle the next day.
That’s something I do now every few months and like I said I had the same problem with the competitor’s blender as well so it could be mostly due to my hard water. But in case any of you have the same issue, I thought I’d leave the fix right here.
Thanks so much for joining me today! If you’d like to check out the Blendtec Total Blender Classic or any of the other products that I’ve used today, I’ve provided links in the description below along with the full recipes from today.
RECIPE LINKS BELOW⬇️
🛒 Links to products found in this post:
Sliders for Under Countertop Appliances (Heat-Resistant)
Fine Mesh Strainer / Colander Set
KitchenAid Glass Stand Mixer Bowl
Chosen Foods Avocado Oil Mayonnaise
Vera Bradley Apron (Rose Toile)
🍽️ RECIPES found in this post:
🫐🍓Berry Blast Protein Smoothie Recipe🍓🫐
🥗🥕🫚Carrot Ginger Dressing Recipe🥕🫚🥗
Click here for more Product Reviews

Hi, I’m Allison, the founder of Simple Fantastic Kitchen. I live in the mountains in a tiny house with a tiny kitchen where I make