
-
Simple Fantastic Kitchen
This post may contain affiliate links. See my disclosure policy.
This KitchenAid Attachment Makes Perfect Ice Cream?
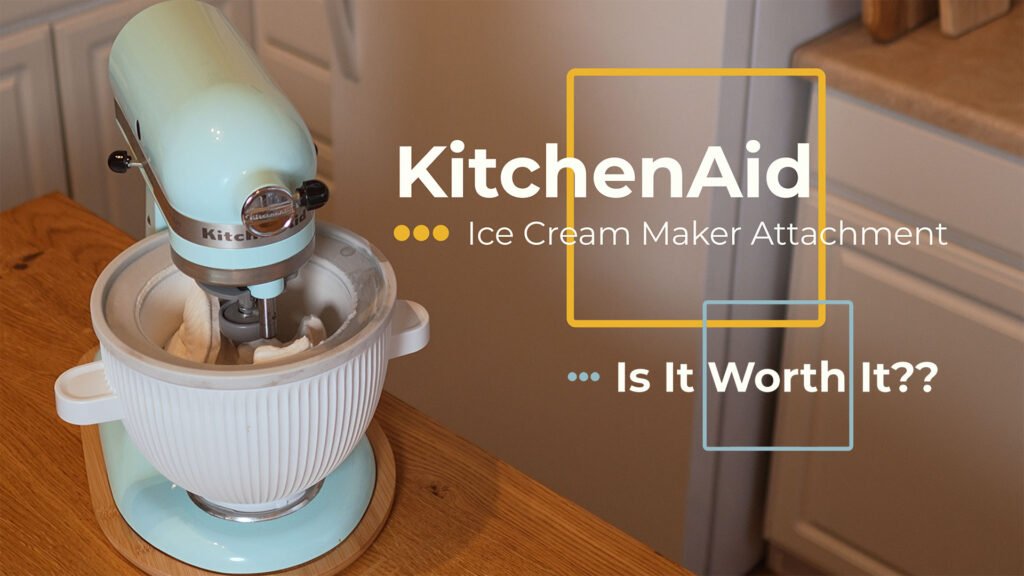
Today I’m unboxing and reviewing the KitchenAid ice cream maker attachment. If you’ve been curious about or considering this ice cream maker attachment for yourself, then this video is for you. I’ll be walking you through everything from the unboxing experience to testing this in action with a few simple ice cream recipes.
You can watch my detailed video below or read on for the full experience!
KitchenAid Ice Cream Maker Attachment | Unboxing
I’ve had my eye on this unit for quite a while. So, let’s go ahead and unbox.
Okay, first we encounter some paperwork, including a manual. And it looks like a quick start guide. And warranty information. And then this important document telling about your unit.
And then it looks like the unit is going to come with three pieces. We’re going to have the dasher, the drive assembly, and then the freeze bowl. The box is outfitted in such a way that you can easily store your unit back inside when not in use. But we’re going to put the box to the side for now.
KitchenAid Ice Cream Maker Attachment | Specifications
The ice cream maker attachment works with all KitchenAid tilt head stand mixer models except for the mini models KSM 3316 and KSM 3317. Those won’t work.
I’ll be demonstrating the ice cream maker attachment on my KitchenAid tilt head stand mixer which is such a wonderful product. I have had mine since 2019 and I have been absolutely amazed at what an awesome powerful machine it is. I have never once had an issue with it. So, I recommend these highly.
According to the instructions, the freeze bowl right here has to be washed by hand, but the drive assembly and the dasher are both dishwasher safe. We’ve already washed and thoroughly dried these.
So, now the freeze bowl is recommended to go into the freezer for at least 16 hours. But first, I want to tell you something. We’re going to tilt the freeze bowl back and forth. That swishing sound you will hear is the internal liquid that is currently thawed. We will remember that sound and come back to it later, but for now, we’re going to put the freeze bowl into the freezer overnight.
Next, we’re going to make our ice cream recipes.
The greatest thing about having an ice cream maker is that you can create ice cream to your own specifications. Do you want to use maple syrup instead of sugar or a zero sugar substitute? Do you need to skip the dairy altogether? or do you just want to make real traditional ice cream? This product has you covered.
Today, I’ll be making a traditional ice cream as well as showing you how to make a non-dairy, low carb, low sugar ice cream to see how well this unit works for both versions.
So, first we’re going to make a delicious cookies and cream ice cream.
Test 1: Cookies and Cream Ice Cream
We’ll start by making our base, which is a delicious real vanilla ice cream recipe with simple, wholesome ingredients.
We’ll start with the heat off on our stovetop. Into a large saucepan, we’re going to add three cups of half and half, 2/3 of a cup of granulated cane sugar, 2 tsp of vanilla extract, 1/8 of a teaspoon of sea salt, and as an optional addition, you can add 1/4 teaspoon of xanthan gum, which is considered a natural stabilizer and helps prevent ice crystals from forming and it’s often used in organic food products.
Then we’ll turn the heat on to medium low and we’ll stir it often for about 5 minutes until the sugar dissolves and the mixture is warmed through. Using a whisk is very helpful to separate everything out because the sugar can clump together a little bit.
And depends what kind of pan you have. If you have stainless steel pans, using a regular whisk is absolutely way to go. But if you have a non-stick coating or anything that doesn’t really handle metal well, these are fantastic. They’re silicon coated whisks. They’re awesome. They do the job without damaging the pans. Love them. I’ll have a link to this below, as well as all the other products you see in this video in case you want to check them out.
It’s super normal for it to get a little frothy. I mean, you’re basically becoming a hand churned frother at this point, but you don’t want it to boil. There’s a difference between frothing and boiling. Very fine line.
Now, we’re going to let it cool for a few minutes, and then we’re going to pour it into a covered, heat proof, airtight container.
Now, we’re going to put it into the refrigerator to chill for at least 2 hours. It has to be fully chilled before ice cream can be made.
The next step is chopping a sleeve of Oreo cookies. We got double stuf, but feel free to get any kind of sandwich cookie that sounds good to you.
So essentially we have finely chopped or minced the Oreo cookies.
KitchenAid Ice Cream Maker Attachment | How To Use
So the next step is going to be to churn the ice cream. Our freeze bowl should be frozen. So let’s check on it. Let’s tilt it back and forth. Remember the swishing sound? I can’t hear it anymore. If I had, we’d have to put it back into the freezer for a little while. But since the liquid is completely frozen, we are ready to proceed.
First, place the dasher inside the freeze bowl. And another thing is there’s a little piece on the back. We want that piece to be facing the interior because it helps hold it in place.
Then place the freeze bowl on the clamping plate and turn it until it locks into place.
Next, place the drive assembly onto the mixer, aligning the cutout with the mixer shaft. So, there’s sort of a wider edge and then a more narrow edge. The wider edge is the one you want to start with. The cut out in the stand mixer will match the cutout drive assembly. Just sort of press it in.
Lower the motor head to engage the drive assembly with the dasher. If the drive assembly engages the dasher, you’ll hear it. It’s like a click. If you don’t hear a click, you’ll slide the drive assembly either back or forward until it does engage properly.
You’re going to make sure the motor head is down completely, then lock it.
The next step is very important. You have to turn the stand mixer on to stir, which is the lowest setting, and then start pouring your ice cream batter in. If you don’t do it in this order, the batter could freeze prematurely and lock the dasher.
Per the manual, they say to let it mix on the lowest setting for 20 to 30 minutes, but I found it was really closer to 15 to 18 minutes until my ice cream was ready.
You’ll know when it’s ready when it starts sort of creeping up towards the top and it has the consistency of soft serve ice cream. There will probably also be a tiny ring of ice cream around the top edge of the freeze bowl. This is when you know it’s time to add any additional ingredients.
We’re going to be adding chopped Oreos today, but you can also add fruits, nuts, candies, cookies, or chocolate chips. You should do so in the final two minutes of mixing.
Now, this part is also really important. You must not stop the mixer before adding your Oreos. If you stop the mixer, a freezing could occur, which would lock the ice cream maker, making any further stirring impossible.
So, just keep the stand mixer on, stir and add your Oreos or other fixings in at that time.
Also important is that you add your fixings before the ice cream is completely done because a clicking sound might occur. That means it’s done and it will not stir anymore. We found that out the hard way when trying to make another batch. So, you don’t want to do that.
One other pro tip, you’ll want to decant your chilled ice cream batter into something that has a pore spout as it will be much easier and less messy when pouring into the freeze bowl.
I think the reason they might say 20 to 30 minutes, they want to give you a range because it depends what ingredients you’re using. Real milk is probably going to churn in a different way than coconut cream or other non-dairy choices.
Also, add your fixings a little bit at a time. And again, decant your fixings into something that has a little pore spout on it. It’s just easier to work with when it comes to this. Watch the blending. For chunkier fixings, churn for less time. Churn for more to really incorporate them in.
For me, the entire process with the Oreo cookies added in was about 16 minutes, I would say. That’s just a reference point. You know, it probably depends on how cold your freeze bowl is, how chilled your ice cream batter is. It depends what you’re using and so on and so forth. So, there are variables here, but uh this is my experience with it.
So, now that the ice cream is completely finished, you’re going to use a rubber spatula, plastic or wooden spoon. Basically, don’t use metal inside the freeze bowl. That’s the big takeaway. But I found that the rubber spatula was the easiest to work with and you could get the most out of it.
You’re going to transfer the ice cream into a dessert dish or airtight freezer container for storage. I love these little ice cream containers that I just got. They even come with these adorable little labels that you can hand write your ice cream flavor onto. So cute.
Now, I just want to also let you know that if soft serve is your bag, now is when you want to eat it. You don’t need to put it into the freezer any further because it is the perfect consistency for soft serve ice cream right now. This honestly could not look more beautiful.
Let’s put it in the freezer for about 2 hours to fully form into ice cream.
Now, just something to be aware of. I’m not sure if you’ll be able to make a second batch of ice cream right away. You’ll probably want to wait for the freeze bowl to thaw properly. Hand wash it. Let it dry completely, then refreeze it per the instructions before making another batch. And honestly, this works great.
You can make a new batch of ice cream several times a week this way. And one fun way to make one ice cream flavor for a group is to just make the vanilla ice cream recipe I’ve included and then have everyone choose different toppings that you’ll put on in the dish.
How does it taste? Okay, that is so amazing. Wow. And it tastes so much better than store bought. It just tastes wholesome to me.
Next, we’re going to make a non-dairy vanilla ice cream recipe that’s low in carbs and sugar.
Test 2: Low Carb, Non-Dairy Vanilla Ice Cream
We’re going to start with the heat off, and then we’ll add two cans of unsweetened coconut cream or full fat coconut milk. I do not recommend going with low-fat when it comes to ice cream. It’s probably not going to turn out well. You just want to go for the full fat when it comes to this. Just so you know, this is two cans of 13 1/2 fluid ounces. It’s just a little bit more than three cups.
Then you’re going to add granulated zero sugar Lakanto. Lakanto comes in a few different varieties. There’s a zero sugar powdered sugar. There’s a zero sugar brown sugar. And then there’s a zero sugar granulated sugar, which is what we’re going to be using today. So 2/3 of a cup of granulated zero sugar Lakanto.
Two teaspoons of vanilla extract, 1/8 of a teaspoon of sea salt, and as an optional addition, you can add 1/4 teaspoon of xanthan gum, which is considered a natural stabilizer, and it helps prevent ice crystals from forming on your ice cream, which is kind of great, and it’s often used in organic food products. We’re gonna add it into ours.
Then we’ll turn the heat on to medium low and we’re going to stir it pretty much the whole time for 5 minutes until the sugar dissolves and the mixture is warmed through. You just want to make sure there’s no clumps.
It’s perfectly normal for it to bubble and froth a little bit, but we would prefer it not to boil over. So, just keep the heat on medium low and just keep it at only about 5 minutes. We have warmed it through and we have incorporated the ingredients beautifully.
So now we’re going to let it cool for a few minutes and pour it into a covered heat proof airtight container.
Then we’re going to put it in the refrigerator to chill for at least 2 hours because it has to be fully chilled before the ice cream can be made. As a reminder, take your fully chilled ice cream batter and decant it into a container that has a pore spout.
Then make sure the freeze bowl is completely frozen. Now place the dasher inside the freeze bowl. With the nub side facing back, place the freeze bowl on the bowl clamping plate until it locks into place.
Then place the drive assembly onto the mixer, aligning the cutout with the mixer shaft.
Then lower the motor head to engage the drive assembly with the dasher.
Now lock the stand mixer and turn it on on the lowest speed and start pouring.
For this recipe, we are going to add a topping only after we fully make the ice cream. So, we will let it churn for closer to 18 to 20 minutes total. When the ice cream is creeping up on the sides and a tiny ring is forming around the top edge, it’s ready. It appears to have the consistency of frozen yogurt or soft serve. So, we know this batch is done churning. We’re at about 20 minutes of churning on stir. Let’s turn it off.
Oh, it looks so good. If you have it right now, it’s more the consistency of a soft serve or a frozen yogurt, but it is absolutely delicious. And if that’s the way you like to eat it, now is the time to eat it.
Now, using a rubber spatula, plastic, or wooden spoon, transfer the ice cream into a dessert dish or airtight freezer container for storage.
I’m finding that a rubber spatula works best. I think with plastic you wouldn’t be able to scrape the sides as well. And we’re ready to pop this into the freezer for a couple of hours and then we’ll be enjoying it.
And now, just for fun, I’m going to add a little topping: Lily’s Milk Chocolate Chips. They have zero sugar and are so delicious.
This brand is also great for no sugar baking. They have a few different flavors available, including semi-sweet chocolate chips and peanut butter chips.
So, how does the non-dairy ice cream taste? That is so delicious. The chocolate chips are really a lovely addition, too. But honestly, vanilla by itself is really fabulous. That is absolutely delicious. And see, you can’t get this at the grocery store, so it’s a pretty fantastic thing.
KitchenAid Ice Cream Maker Attachment | Final Review
So, is the KitchenAid Ice Cream Maker Attachment worth it? I say absolutely yes. Especially if you love making ice cream your own way.
This is the perfect product for someone who loves traditional ice cream or someone who has dietary needs beyond what is offered in the supermarket. With the KitchenAid ice cream maker attachment, you can create the perfect ice cream for you.
And don’t forget, you can also make sorbets, frozen yogurts, gelatoes, frozen custards, and more.
I am so glad that I bought this. And by the way, I bought this. Nobody’s nobody sent me the product. I bought this and I’m really glad I did. I’ve been looking at this for such a long time. And because I’m not going to be making like 12 batches a day… for me, this is like the perfect product. I already have the stand mixer. So, for me, it was just a perfect add-on.
And I know for a lot of you out there, maybe you do or don’t have the stand mixer, but maybe you’ve been thinking about the stand mixer for a while. If you don’t have it yet, it is one of the most awesome investments I have ever made. It makes my cooking and baking so much easier and more fun.
I am so glad that I got this and I’m going to be using this for years to come.
If you’d like to check out the KitchenAid ice cream maker attachment or any of the other products I’ve used today, I’ve provided links below. The full ice cream recipes are below as well. Thanks for joining me and I’ll see you on the next one!
RECIPE LINKS BELOW⬇️
🛒 Links to products found in this video:
KitchenAid Ice Cream Maker Attachment
Ice Cream Containers (set of 2)
Pyrex Glass Food Container with Lid
Nonstick Ceramic Saute Pan 10-Inch
Vera Bradley Apron (Rose Toile)
Lily’s Peanut Butter Flavor Chips
Lakanto Brown Sugar Replacement
Lakanto White Sugar Replacement
🍽️ RECIPES found in this video:

Hi, I’m Allison, the founder of Simple Fantastic Kitchen. I live in the mountains in a tiny house with a tiny kitchen where I make